Candy’s Version of Chicago Sweet Barbecue Sauce

Today, I got some of the older (not outdated though) bulk cans of tomato sauce and catsup out of the pantry wanting to try a new recipe using them. We’re big fans of a particular  BBQ chain across the U.S. We especially love their Chicago Sweet and St. Louis Style sauces. I wanted to give the first one a try. Looking at the ingredients, I pulled everything we needed out of the cabinets and started mixing. The original recipe called for red wine vinegar but all I had was apple cider vinegar and white vinegar. I used the apple cider vinegar to give it a little more pizzazz. I made some other substitutions, put a half cup more brown sugar in it, more chili powder and a little less celery salt.

As I made it, I measured the contents of the bulk cans. The catsup can holds 11 cups of catsup and the tomato sauce came out at 12 cups exactly. I’ll share my recipe, but for this batch of BBQ sauce to can, I increased the proportions by 6 to use the entire cans of tomato sauce and catsup. Oh my!! Is it ever good! It has a bit of a kick to it, so if you prefer sweeter BBQ sauces, lessen the amounts of the hotter spices and taste it as you go.

here we go…

Candy’s Version of Chicago Sweet BBQ Sauce.

2 cups catsup

2 cups tomato sauce

1-3/4 cups brown sugar

1-1/4 cups apple cider vinegar

1/2 cup molasses

4 teaspoons liquid smoke. I used hickory flavored.

2 tablespoons butter

1/2 teaspoon garlic powder

3/4 teaspoon onion powder

1/4 teaspoon chili powder

1 teaspoon paprika

1 teaspoon celery salt

1/4 teaspoon cinnamon

1/2 teaspoon cayenne pepper, as desired (or a scant 1/4 teaspoon red pepper flakes)

1 scant teaspoon black pepper.( I only had a fine ground black pepper so I used less. The finer ground pepper is, the hotter it tastes.)

DIRECTIONS:

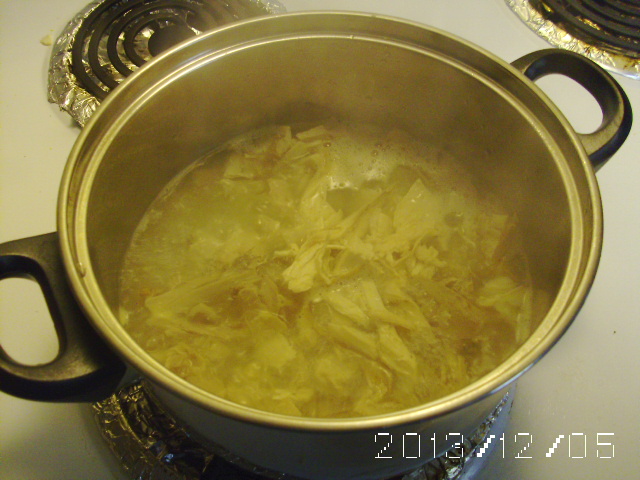
  1. Place all ingredients n a very large saucepan. I wound up using a hot water bath canner to cook the sauce in. 6 batches equals a LOT of sauce!
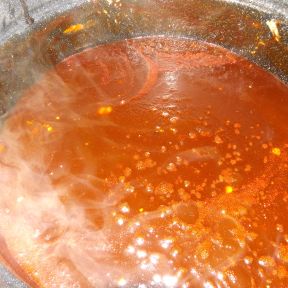
  1. Reduce heat to low and simmer for 20 minutes, stirring often to prevent scorching. The yellow dots you see is the butter as it’s melting. See the steam? It smells absolutely delicious!

Candys version of Chicago Sweet BBQ sauce

  1. Prepare canning jars, lids and rims per directions in the Ball canning book. Set aside.
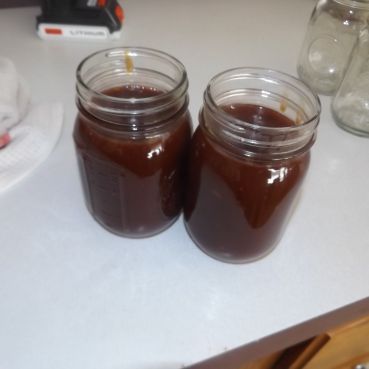
  1. Ladle hot barbecue sauce into jars, leaving a 1 inch headspace. Wipe rims of jars with a clean cloth or paper towel soaked in white vinegar. (I’ve never had a seal failure using vinegar to clean the jar rims. )  Candy's Chicago Sweet BBQ sauce ready to can.JPG
  1. Process in a boiling water bath for 20 minutes per the Ball canning book directions. Remove from the hot water, allow to cool without touching the lids. In the event of a seal failure, you may remove the lid, prepare a new one and re-process. Be sure to check the edge of the rim of the jar for chips or breaks, or debris that may have caused the seal failure.

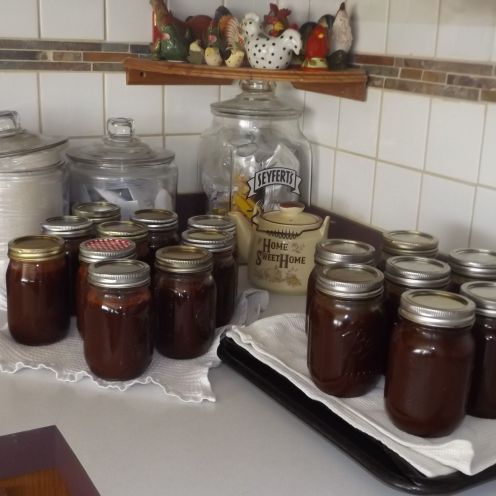
I had one jar that broke in the last canner load crying sad face but, I still have 18 pints to use.

Candys version of Chicago Sweet BBQ Sauce all done

  1. Store opened jars of barbecue sauce in the refrigerator.

New Recipes

Aha! I took time to read old email and found a super recipe from my best heart sibling (we adopted each other, a sister and brother combo, sibs from other mothers)  that we’re going to try. This one came from a web page called Cappers Farmer.  I love reading their recipes and posts. Here is is, sharing my favorite from them, to you. http://www.cappersfarmer.com/food-and-entertaining/pear-cranberry-conserve-recipe.aspx?PageId=1


Pear Cranberry Conserve

The combination of pear and cranberry is a delightful one for fall. The addition of ginger really makes the flavors sing, and the almonds provide a chewy crunch. For the best texture, use pears that are still quite firm so that the pear pieces remain intact when cooked. While  unsweetened dried fruit is generally preferable in conserves, it’s very difficult to find unsweetened dried cranberries, so feel free to use the sweetened version if that’s what you have available.

Before You Begin:

Prepare calcium water.  To do this, combine 1/2 teaspoon calcium powder (in the small packet in your box of Pomona’s pectin) with 1/2 cup water in a small, clear jar with a lid. Shake well.  Extra calcium water may be stored in the refrigerator for future use.

Yield: 4 to 5 half-pint (8-ounce, or 236 ml) jars

Ingredients

2 pounds (910 g) ripe, firm pears

1/2 cup (75 g) dried cranberries

2 tablespoons (28 g) finely chopped crystallized ginger

1/2 cup (63 g) sliced almonds

1 1/2 cups (355 ml) water

1/2 cup (120 ml) lemon juice

4 teaspoons (20 ml) calcium water

1 cup (200 g) sugar

3 teaspoons (9 g) Pomona’s pectin powder

Directions

  1. Wash your jars, lids, and bands. Place jars in canner, fill canner 2/3 full with water, bring canner to a rolling boil, and boil jars for 10 minutes to sterilize them. (Add 1 extra minute of sterilizing time for every 1000 feet above sea level.) Reduce heat and allow jars to remain in hot canner water until ready to use. Place lids in water in a small sauce pan, heat to a low simmer, and hold until ready to use.
  2. Peel, core, and dice pears.
  3. Combine diced pears in a saucepan with dried cranberries, crystallized ginger, sliced almonds, and the 11/2 cups (355 ml) water. Bring to a boil over high heat, reduce heat, and simmer, covered, for 5 to 10 minutes or until fruit is soft, stirring occasionally. Remove from heat. Mix well.
  4. Measure 4 cups (946 ml) of the cooked mixture (saving any extra for another use), and return the measured quantity to the saucepan. Add lemon juice and calcium water, and mix well.
  5. In a separate bowl, combine sugar and pectin powder. Mix thoroughly and set aside.
  6. Bring pear mixture back to a full boil over high heat. Slowly add the pectin-sugar mixture, stirring constantly. Continue to stir vigorously for 1 to 2 minutes to dissolve pectin while the conserve comes back up to a boil. Once the conserve returns to a full boil, remove it from the heat.
  7. Can Your Conserve: Remove jars from canner and ladle jam into hot jars, leaving 1/4 inch of headspace. Remove trapped air bubbles, wipe rims with a damp cloth, put on lids and screw bands, and tighten to fingertip tight. Lower filled jars into canner, ensuring jars are not touching each other and are covered with at least 1 to 2 inches of water. Place lid on canner, return to a rolling boil, and process for 10 minutes. (Add 1 extra minute of processing time for every 1000 feet above sea level). Turn off heat and allow canner to sit untouched for 5 minutes, then remove jars and allow to cool undisturbed for 12 to 24 hours. Confirm that jars have sealed, then store properly.


From: http://www.cappersfarmer.com/food-and-entertaining/pear-cranberry-conserve-recipe.aspx?PageId=1


It’s A Good Day to Bake Bread

Oh my! Living in the Midwest at this time of year is a one of a kind experience. One day, it’s hot, muggy, the humidity level is so high one can barely breathe, the next day is cool, crisp and fall-like, just inviting you to be outside savoring the fresh air and sunshine. Today, we’re blessed with rain. The storms moved in yesterday afternoon and drenched our parched earth, the crunchy grass with a blessed drink of liquid that it all so desperately needed. It’s still cloudy and cool outside, so being the farm wife that I am, it’s a good day to bake bread and finish canning the tomatoes and peaches.

I want to share with you a recipe that I’ve used for quite awhile.The original recipe came from http:www.restlesschpotle.com and I’ve used it for the last couple of years. About the only change I made from her recipe is that we leave the ginger out and added or tweaked a couple of the other ingredients to suit our personal taste. It’s wonderful, light, and has a delicious taste of honey and buttermilk. I’d advise using raw honey if you have it available. The stronger the honey flavor, the better the taste of the bread.

Honey Buttermilk Bread

Ingredients

  • 2 1/4 teaspoons of yeast granules  (1 packet)
  • 1-2 teaspoons sugar
  • 1/4 cup warm water
  • 2 cups buttermilk heated gently to lukewarm
  • 1/3 to 1/2 cup natural raw honey
  • 1/4 cup melted butter or margerine
  • 1 teaspoon salt
  • 1/2 teaspoon baking soda
  • approximately 6 cups white bread flour. Plain (not self rising) flour may be used, but the end product is not as tasty and light, nor does it have quite the same texture.

Instructions

  1. Dissolve yeast in warm water, then add sugar. Set aside until you see bubbles forming.
  2. After the first mixture bubbles, add buttermilk, honey, salt, and baking soda.
  3. To the liquid, add about three cups of flour and mix until smooth and elastic feeling. This can be done by hand or with the dough hook on an electric mixer.
  4. Add butter to this mixture, making sure that it is completely incorporated into the batter.
  5. If you are using an electric mixer, when dough pulls from the sides of the bowl remove the dough a floured surface and add enough flour to make a pliable mound of dough. Knead this dough until it is elastic and smooth.
  6. After kneading, place it into a greased bowl and allow it to rise until it is at least doubled in size. (About 60-90 minutes)
  7. Punch down, cut in half, and roll each half into a rectangle, about 1 inch thick. Then by hand, roll each rectangle, starting from the short end into a “log roll”. Pinch seal the long side. With your hands, gently mash the short sides down, tuck under the loaf and place in greased loaf pans. Allow loaves to rise until doubled in size, about 45 minutes.
  8. Preheat oven to 400F. Bake for 30 minutes or until golden brown on top and hollow sounding when tapped with the fingertips.
  9. Remove loaves from oven
  10. Allow to cool in pans for 5-10 minutes. Brush tops of loaves with melted butter or margarine.
  11. Turn out onto wire racks and allow to cool completely before cutting or tearing bread.
  12. Enjoy!!

Turkey Pot Pie

Aha!!  You only thought the recipes were over. I have another one for you. Actually, we’re having it tonight just so I can get rid of that turkey.


                                     Candy’s Turkey Pot Pie

This is a quick and easy way to get rid of leftovers, including those bits and pieces of leftover veggies that you have hiding in your freezer door space.

Speed Star 1.0318636  002 cups turkey cut into bite sized pieces

2 chicken bouillon cubes

2 cups water, chicken or turkey broth

Speed Star 1.0410454  002 cups of any leftover veggies you have in your fridge, freezer or both. Or, if you don’t have or save leftover vegetables, use 1 can of mixed vegetables

1/2 cup celery chopped into 1/2 inch chunks

1/2 cup coarsely chopped onion

2 potatoes, scrubbed well, peelings left on, chopped into bite sized pieces

2-3 carrots, scrubbed well, peeled, cut into 1/4 inch coins

1/2 teaspoon sage or less, depending on taste

1/4 teaspoon garlic powder

1/2 teaspoon dried celery leaves or celery seed, or less, depending on taste

Pie Crust as below.

To prepare filling:

1. Add chicken bouillon cubes to turkey broth, gravy, or water in a large saucepan. Stir until bouillon cubes dissolve.

2. After bouillon cubes have dissolved, add turkey and all the vegetables.

3. Bring to a boil again.

4. Speed Star 1.0380539  00Add 1-2 tablespoons cornstarch to water, stir until cornstarch has dissolved and add to meat/vegetable mixture.

5. Bring to a boil and simmer, stirring constantly, until liquid has thickened to your liking.

6. Remove from heat, stir occasionally until mixture is no longer boiling hot.

In the meantime, prepare your pastry crust as follows: (this fits a 13″ x 9″ cake pan)

2 cups flour

1 teaspoon salt

1/2 teaspoon celery seed

1/2-3/4 cup shortening

enough ice cold water to make a pastry dough

Speed Star 1.0417452  001. Add dry ingredients and mix well

Speed Star 1.0404522  002. Blend in shortening until mixture resembles coarse crumbles. Don’t worry about having too much shortening. The more shortening, the flakier your crust will be.

3. Add ice cold water, by tablespoonful’s until pastry dough forms into a ball. If you accidentally add too much water, sprinkle flour over the dough and knead in until pastry dough is dry enough to roll out with a rolling pin.

Speed Star 1.0396524  004. Divide dough in half

5. Roll dough out to 1/8th inch thick and long enough and wide enough to fill a 13′ x 9″ cake pan

Speed Star 1.0393545  006. Fill with slightly cooled turkey pot pie filling.

7. Place a 2nd crust on top and seal edges. Cut slits in the top for steam to escape.

8. Bake at 350 degrees Fahrenheit for about 45 minutes or until crust is brown.

9. For a softer top crust, brush with butter after baking. For a flaky, shiny, brown crust, brush with milk and return to oven for 5 minutes or so.

10. Remove from oven and allow to stand for 10-15 minutes before serving.


In just a little while, I’ll show you the finished product. Check back for a mouth watering photo.

What do you do with your holiday leftovers?

If you’re like we are, holidays are fun, have too much food left over, full tummies that are so tired of turkey, that we wind up feeling like stuffed turkey ourselves. The last few years have had our imaginations running wild, trying to figure out ways to repurpose that turkey, cranberry sauce, sweet potatoes and other fixin’s into something palatable and exciting. This year, I think we hit upon a winner. While I didn’t take pictures of it, this is a recipe that I expanded upon at a place of employment many years ago. What do you do with your leftovers?

Cranberry Spread

1 can jellied or whole cranberry sauce
1/4 cup super finely chopped celery
2-3 tablespoons finely chopped walnuts (optional)
1/8 teaspoon cinnamon
1 tablespoon orange zest
1 tablespoon orange juice
1-2 tablespoons honey
1 tablespoon honey-Dijon mustard

With a wire whisk, whisk all ingredients together, spread on whole wheat or other whole grain bread, add a layer of salad greens of your choice, thinly sliced turkey, maybe provolone, cheddar or Swiss cheese, sit back and enjoy the tangy tartness of the spread, the creaminess of the cheese, and the delicious wholesomeness of the turkey and bread.

National Indian Pudding Day

OK, I’ve heard it all now! I am part Cherokee, still working on genealogy to send in to the Cherokee Nation to prove my heritage so that I can be a registered member of the Cherokee Nation, but that’s a whole ‘nother story. For the time being, I am a member of the Overhill Cherokee Nation, which is not recognized by the US Government, nor the Cherokee Nation, but is still an honor. It is for those of us who have Cherokee heritage, maybe not enough to be carded, nor enough to prove to the CN, but is an extremely large group of Native Americans who still learn, practice, honor and embrace the Native American way of life. When I heard of this “day” I had to go find a recipe. Well, I must say! It looks wonderful!!! It looks rich, very inexpensive to make (aka “frugal”) and looks good!!!  I just wanted to share it with you so you can celebrate the day with us.Indian Pudding

http://spoonful.com/recipes/indian-pudding

Alison Needham                   


What you’ll need

  • 1/2 cup yellow cornmeal, medium grind preferable
  • 4 cups whole milk
  • 1/4 cup molasses, not blackstrap
  • 1/4 cup maple syrup, grade B preferable
  • 1 extra-large egg, lightly beaten
  • 2 tablespoons butter, cut into 4 pieces
  • 1 teaspoon ground ginger
  • 1/2 teaspoon ground cinnamon
  • 1/4 teaspoon salt
  • 1/8 teaspoon ground cloves
  • 1/8 teaspoon ground nutmeg
  • 1/8 teaspoon baking soda
  • vanilla ice cream or sweetened whipped cream for serving
Notes:

Yields 6 to 8 servings

How to make it

  1. Preheat oven to 300 degrees.

  2. Place cornmeal in a large saucepan. Slowly whisk in half the milk, making sure there are no lumps.

  3. Whisk in the remaining milk, molasses, maple syrup, egg, butter, spices and baking soda. Place the saucepan over medium high heat, stirring constantly, taking care to reach the corners of the pan and bring the mixture to a simmer.

  4. When the mixture is boiling softly, continue to cook, stirring constantly, for 30 seconds more. Pour into a greased 8×8 inch baking dish. Bake until pudding bubbles around the edges and the surface becomes a darker brown, about 1 1/2 hours. Serve warm.

And One Last Elderberry Recipe to Share with you

elderberry flowers

Refreshing Elderflower Drink

At the beginning of elderberry season, you have about 2 weeks to gather elderflowers before they drop off, forming the tiny green pellet sized balls that will eventually turn into the wonderfully, medicinally, rich in Vitamin C berries that are well known for their health benefits. Elderberries grow on canes, with a smooth tan-gray bark, usually in clusters along the wetlands as I explained earlier. Elder flower clusters are a creamy white, have a lemony smell and are in clusters about the size of a dinner plate. If you’ve ever taken walks in the woods, along the creeks or a river bank, there’s no mistaking an elder cluster from another tree. The canes can grow 8-10 feet high or higher, are very pliable, and actually, can be transplanted in their smaller stages to a place on your own farm.

For a wonderful, crisp, lemony flavored drink that’s high in Vitamin C and antioxidants, gather the flower clusters, rinse in a mild solution of vinegar and water to dislodge bugs or other debris, rinse and drain.

Use about 2-4 small clusters of the flowers from a flower head, put into boiling hot water and allow to steep for about 20-30 minutes. Strain the liquid, sweeten if desired.

It can be consumed as a hot tea, or chilled and ice added for a refreshing summertime drink.

NOTE: If you’re really crazy about elder flower tea as I am, you can dry elder flowers, store in an airtight container and use 1 teaspoon full in a tea strainer or a small muslin tea bag, in a cup of boiling water, steep and strain as above, to enjoy the summery fresh flavor of elder tea all winter long. It makes a nice gift too!!!


Medicinal Herb of the Day: Elderberry (sambucus sp.)

elderberry

I owe you one from yesterday, so here’s another for your enjoyment.

The health benefits of elderberries are all the rage now. Elderberry farming is becoming increasingly popular and quite a money making venture for some entrepreneurs.  Personally, I love to harvest elderberries from the wild since I know that they’re pure, wholesome and not tainted with chemicals. You generally find them growing in wetlands, along creek banks, river banks, ponds and such. I would not recommend harvesting them from the roadside since they have become contaminated with vehicle exhaust fumes and residue, from roadside spraying, etc.  Let me share with you a LONG story about elderberries and how good they are for you.

Uses:

Antiemetic (relieves nausea)

Poultices help relieve engorged breasts on humans as well as animals.

Poultices help increase healing of slow to heal wounds

Wonderful in salves for skin conditions such as boils, eczema, acne,

Poultices have an analgesic effect and can help ease the pain of toothaches and also help reduce the bacterial load of the infection in the gums

Wonderful antioxidant properties for heart ailments

Used to treat colic

Used to help treat venereal disease

Used to help alleviate water retention

Used to help decrease fever

Used as a blood purifier

Used as a pain reliever in poultices and salves for arthritis and muscle aches and pains

Helps to relieve congestion

In tonics, helps to alleviate coughs and the symptoms of the common cold

Can be used in suppositories, to relieve nausea if oral products cannot be taken.

To make a tincture.

Use only fully ripe elderberries. They should be a blue-black color and juicy. Do not use red or green berries as these will make the tincture or tonic bitter. Soak the pods of berries in a mild solution of baking soda or vinegar and water. This will not only clean the berries, but will remove bugs and other debris. Rinse and drain the berries in a colander. I use my fingers to remove the berries, but know that elderberries will stain anything they touch to a nice shade of lavender. On fabrics, the stain is permanent, so wear an apron!! Gently roll the berries off their stems into a large bowl. You can use a fork to dislodge the berries if you choose, but I find this to be slower and more tedious than using my hands. After all, we’re farm wives and what’s more to seeing a farm wife with a few stains on her hands, right? another easy way to separate the berries from the stems is to put the washed, drained berries in a zip-lock bag and freeze them. Frozen berries pop off like magic. After removing them from the stems, rinse again, and drain into a colander.

To make the tincture, put enough berries in a sterilized glass container to fill about 1/2 way up to the top. Cover the berries with vodka, everclear or brandy. The alcohol should be at least 80% proof. Cover and allow to sit in a dark, cool place for at least one month. Swirl (do not shake) the container occasionally during the tincturing process. After a month, strain the berries through a cheesecloth, rebottle the tincture in a sterile amber or blue bottle, and  label. As long as it’s kept in a cool, dark place, it will keep for several years. 

To use the tincture, measure the tincture using about 1 teaspoon in a glass of water. Take this about 3 times per day at the start of a cold or the flu.

———————————————————————————————————————————–

Elder Rob

10 c. Elderberry Juice
5 c. Sugar
1/4 c, whole cloves,
1/4 cup chopped fresh ginger (or 1 tablespoon powdered).

Combine all and stir to dissolve sugar. Cook until thickened slightly. Strain out cloves and ginger, if desired. Store in a sterilized Jar or bottle and water bath can for 15 minutes.  Wonderful for coughs and colds.


Candy’s Chicken (or turkey) Pot Pie

Great for left overs from Christmas or Thanksgiving. Wonderful meal in itself on a cold night!

Ingredients:

Pie Crust for an 8×13 inch cake pan.

Use your standard pie crust recipe but to the flour add:
2 teaspoons celery seed
1/4 teaspoon powdered sage

FILLING INGREDIENTS:

1-2 cups shredded or cubed poultry
2 cans mixed vegetables
2 whole potatoes, scrubbed, skins on and cubed
2 large carrot sticks, peeled and sliced into 1/4 inch slices
1/2 onion, chopped
left over corn, green beans, lima beams, peas, etc. I save my left over vegetables in the freezer for this and
for soups.
1 teaspoon powdered garlic
1 teaspoon celery seed
1/2 teaspoon powdered sage
pinch of oregano
salt and pepper to taste

Add all ingredients into a large kettle,

Add 1-2 cups water
2 chicken bouillon cubes

Bring to a boil.

Thicken liquid with 1 tablespoon corn starch mixed in water

Stir constantly until liquid is as thick as a medium thickness gravy.

Allow to cool slightly.

Meanwhile, prepare pie crust with celery seed and sage. Line the bottom and sides of an 8×13 inch cake pan.
Pour cooled mixture into pastry lined pan.
Cover with 2nd pastry.
Bake for 40-50 minutes in a 350 degree Fahrenheit oven or until crust turns golden brown.
Brush top of pot pie with milk and return to oven for 5 minutes.

Remove from oven, allow to cool slightly before cutting. Makes 8 large servings. Wonderful 1 pan meal or served with a side salad.

This will freeze well for reheating later.
chicken pot pie
Calories per serving: Way too many to count.