
It’s time to start planning. Don’t we all, and most of the time? Each morning as I open my eyes, stretch, smell the crisp cool air, I begin to contemplate not only the day’s needed activities, but start planning for fall and winter. It seems like summer is barely gone. Fall is beautiful, the colors, the cool respite after a long, hot summer. But, soon to follow are the harsh cold winter months. Living on a farm is glorious, but it sets off a whirlwind of activities that absolutely must be done before winter coldness puts a stop to it.
We’re busy gleaning the last of the garden. Ripe tomatoes are picked daily and frozen until a large enough batch is ready to can. Squash and pumpkins are beginning to turn their lovely shades of yellow to orange, the corn is being harvested and the garden, slowly, but surely is being cleaned out to receive her yearly dose of compost and manure. This year we will plant cover crops on top of the garden for green manure also. I have turnip seed and buckwheat to sow. Our rabbits, chickens, ducks, geese and goats will appreciate that feast as it grows. And, our garden will benefit from the nitrogen content of the plants as we till it under next spring.
But, planning ahead, we have a list of other things that need to be done. I suspect that this list could and would apply to those who live in urban areas too.
Water.  This is at the top of the list. Water storage for the “what if’s” that happened more time last year than we’ve seen since the ice storm of 2007. What if you are suddenly without power and are unable to draw water from your well? Do you have an alternate means such as a hand pump that will work for your depth of well? Hand pumps on deep wells are available, but try to pump water from a 180 foot well. By the end of the power outage, you will have excellent deltoid and trapezius build. Do you have a generator? A wind mill? A well bucket? If you live in the city and depend on municipal services, many times they don’t fail, but how many times have you experienced “boil water” orders? In the event of a natural disaster, how reliable will your municipal water supplier be?
How much water do you need? That depends. Most sites recommend at least 1 gallon per person per day for drinking and minimum sanitation. Quite honestly, for our personal needs, this isn’t enough. What we do, and this is a personal preference, is to store at the bare minimum, 2 gallons per day. We also keep our swimming pool filled summer and winter. Our pool has about 7000 gallons of water, which will go a long way in a power outage. Swimming pool water is not potable for humans, but it is an excellent water source for the farm animals since we don’t have a pond…yet. The pool water can also serve for bathing and commode flushing if needed.
Storing water. How? In almost anything. Glass and food grade plastic are the most common choices. Long term, bulk water storage requires a little extra. It’s at this time of year that we empty, sanitize, refill and add 8 teaspoons of bleach to a 50 gallon, food grade barrel, cap and store on pallets.
Food. Again, the amount to lay back depends on the number of people in your family, finances and room to store food. There are several food storage calculators online. The one we find most useful is http://lds.about.com/library/bl/faq/blcalculator.htm . One must take into consideration special needs of diabetics and those on other diet restrictions, infants, the elderly, and your own personal likes and dislikes. A key factor to food storage is to keep it fairly simple, easy to prepare, allow variety, wholesomeness and nutritive values. I’d not recommend storing a year’s supply of pizza, even though it truly is a healthy food, when you look at it’s contents. Many people think that food storage is a bulky task, hard to find places to store. It truly isn’t. Space under beds, couches, even behind and underneath dressers or entertainment centers is a possibility. I’ve seen closets converted to pantries, and even bases of kitchen cabinets made with hinges on the baseboard and canned goods stored under those. Those with basements are indeed blessed. Rafters can serve as excellent canned good areas if needed. Shelving units can be purchased or hand made. I’d advise never to store anything directly on concrete floors though as concrete can react with plastic containers as well as metal containers, corrode and/or disintegrate those in time.


Don’t forget to remember your animals in your food storage plans. Buy, can, or freeze enough food for them to get them through precarious times. Our outside animals necessitate a little extra. We store food for them, in the barn, in large 55 gallon barrels with lids. Goats are notoriously nosey, and piggy, and, well, determined. We have to use the large metal, lidded barrels in their barn just to keep the food stuff intact and also free of rodents. It also means that we need to check drinking water heaters to make sure they’re operable, make sure that we have enough extension cord in good repair to service the heaters. It means that we need to lay back enough hay, and soon, to last through the winter. As another blogger wrote, shortages are common in the winter. Many farmers keep what they have for their own livestock first. It’s better to stock up while you can, as it becomes available, rather than waiting until the last minute or in the middle of a crisis.
Housing. It’s time to check for any outside needed repairs. Is the power line coming into the house secure? During the winter ice storm of 2007, we saw many conduits leading from the power lines to inside the house, bent and ripped away from the house. Check those, secure with clamps as needed and be safe. Windows, shutters, faucets, outbuildings need inspected and repairs made as necessary. This includes storage sheds, barns, garages, and your home. There’s nothing worse than having to go out in the middle of a freeze to make a repair that’s become mandatory when it could have been fixed simply and with much more ease during the warmth of summer or fall. It’s also time to pull out snow shovels, blowers, ice melt, and auto windshield de-icer.

Heat:  How do you heat your home? Take into consideration the rising cost of propane in the winter months, the potential for a shortage of dried wood for wood heated homes, and the potential for electrical outages in total electric homes. Do you have a safe backup source of heat? Safety is a key word here. I’ve heard people tell me that they have a kerosene heater to use. That’s fine, but make sure you have a way to ventilate that kerosene heater well. Make sure you have a way to ventilate your gasoline powered generator that you will use for space heaters, very well. Carbon monoxide poisoning is, or can be deadly. It sneaks up on the unsuspecting individual and overcomes them before they know it. My husband could tell you a hair raising story about such an event with him just this summer. Ventilate, ventilate, ventilate. Wood. If this is a primary or back-up source of heat for you, you are most likely aware of how many cords of wood is needed for a winter. Stock up now, place it up on pallets and keep it covered and dry. Do this while the weather and supply allow you an ample stock. Wood pellet stoves, again, you know how many bags of pellets your stove needs. The math is easy. Lay back at least enough to get you through an anticipated crisis. For those who use a fireplace, now is the last chance you will have before winter sets in, to clean the flu, make necessary repairs and ready your hearth for use.
Clothing and blankets.  I can remember my grandmother using this time of year to finish quilts. She had quilts made from all sorts of fabric, from Grandpa’s coveralls, to pieces of flannel and wool. I still have one of her wool quilts that is lined with several layers of flannel, has a flannel back, and is so heavy that it held me fast in bed when I was only 5 years old. She mended boots with patches, mended coats, stockings and gloves. Winter wear and heavy curtains were brought out and aired in the crisp coolness of the fall afternoons. Living in an old farmhouse meant drafty and chilly rooms. Now, 50 years later, I have learned that it wasn’t just her house that was drafty at times. Most of us experience the same…ummm…memories. We’ve discovered the art of using window quilts in some of the back rooms during the winter. I’ve made smaller quilts to fit those windows that have a tie back to use during the daytime. At night, the window coverings are closed and keep the day’s warmth in for quite a while. The same inspection and repairs, if needed, is a memorable task we make to this day, just as my grandmother did so many years ago. Items such as boots, gloves, hats, scarves, are purchased well in advance of the winter’s need. Again, no one knows what the winter will bring and it’s better to be prepared rather than in need and the supply not available.
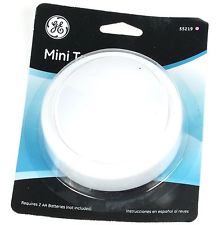
The last item I want to share with you is light. It’s not a necessity, but a welcome luxury in the event of a crisis situation. What are your backup sources for lighting? Battery operated? Candles? Oil lamps? Make sure you have enough fuel stored, and safely for oil lamps. Make sure you have enough matches or lighters stored away to light them, or the emergency candles you have stored. And, with candles, make sure you have a way to use them safely, sans the possibility of them tipping over or having a breeze blow flammable items into the flames. Batteries need to be purchased and stored in a cool, dark place for longer viability. One favorite that I’ve seen used recently are solar powered outside lights. They’re safe, inexpensive (most likely going on sale shortly) and give a fair amount of luminescence for a small sum of money. Here are just a few ideas.


I’m sure that most of you could come up with a much longer list than this for your fall chores either around your city or rural homestead. The most important thing to do, is to get them done. Procrastination isn’t an option if you want to be prepared. If you need to procrastinate, do so when the ground is covered with a heavy blanket of fresh fallen snow, cover up with your nice, warm quilt, have a pair of thick wooly socks on and curl up in front of the fireplace that has been cleaned, repaired and is stock full of the wood you’ve gathered for just this very pleasure.


