Candy’s Version of Chicago Sweet Barbecue Sauce

Today, I got some of the older (not outdated though) bulk cans of tomato sauce and catsup out of the pantry wanting to try a new recipe using them. We’re big fans of a particular  BBQ chain across the U.S. We especially love their Chicago Sweet and St. Louis Style sauces. I wanted to give the first one a try. Looking at the ingredients, I pulled everything we needed out of the cabinets and started mixing. The original recipe called for red wine vinegar but all I had was apple cider vinegar and white vinegar. I used the apple cider vinegar to give it a little more pizzazz. I made some other substitutions, put a half cup more brown sugar in it, more chili powder and a little less celery salt.

As I made it, I measured the contents of the bulk cans. The catsup can holds 11 cups of catsup and the tomato sauce came out at 12 cups exactly. I’ll share my recipe, but for this batch of BBQ sauce to can, I increased the proportions by 6 to use the entire cans of tomato sauce and catsup. Oh my!! Is it ever good! It has a bit of a kick to it, so if you prefer sweeter BBQ sauces, lessen the amounts of the hotter spices and taste it as you go.

here we go…

Candy’s Version of Chicago Sweet BBQ Sauce.

2 cups catsup

2 cups tomato sauce

1-3/4 cups brown sugar

1-1/4 cups apple cider vinegar

1/2 cup molasses

4 teaspoons liquid smoke. I used hickory flavored.

2 tablespoons butter

1/2 teaspoon garlic powder

3/4 teaspoon onion powder

1/4 teaspoon chili powder

1 teaspoon paprika

1 teaspoon celery salt

1/4 teaspoon cinnamon

1/2 teaspoon cayenne pepper, as desired (or a scant 1/4 teaspoon red pepper flakes)

1 scant teaspoon black pepper.( I only had a fine ground black pepper so I used less. The finer ground pepper is, the hotter it tastes.)

DIRECTIONS:

  1. Place all ingredients n a very large saucepan. I wound up using a hot water bath canner to cook the sauce in. 6 batches equals a LOT of sauce!
  1. Reduce heat to low and simmer for 20 minutes, stirring often to prevent scorching. The yellow dots you see is the butter as it’s melting. See the steam? It smells absolutely delicious!

Candys version of Chicago Sweet BBQ sauce

  1. Prepare canning jars, lids and rims per directions in the Ball canning book. Set aside.
  1. Ladle hot barbecue sauce into jars, leaving a 1 inch headspace. Wipe rims of jars with a clean cloth or paper towel soaked in white vinegar. (I’ve never had a seal failure using vinegar to clean the jar rims. )  Candy's Chicago Sweet BBQ sauce ready to can.JPG
  1. Process in a boiling water bath for 20 minutes per the Ball canning book directions. Remove from the hot water, allow to cool without touching the lids. In the event of a seal failure, you may remove the lid, prepare a new one and re-process. Be sure to check the edge of the rim of the jar for chips or breaks, or debris that may have caused the seal failure.

I had one jar that broke in the last canner load crying sad face but, I still have 18 pints to use.

Candys version of Chicago Sweet BBQ Sauce all done

  1. Store opened jars of barbecue sauce in the refrigerator.

New Recipes

Aha! I took time to read old email and found a super recipe from my best heart sibling (we adopted each other, a sister and brother combo, sibs from other mothers)  that we’re going to try. This one came from a web page called Cappers Farmer.  I love reading their recipes and posts. Here is is, sharing my favorite from them, to you. http://www.cappersfarmer.com/food-and-entertaining/pear-cranberry-conserve-recipe.aspx?PageId=1


Pear Cranberry Conserve

The combination of pear and cranberry is a delightful one for fall. The addition of ginger really makes the flavors sing, and the almonds provide a chewy crunch. For the best texture, use pears that are still quite firm so that the pear pieces remain intact when cooked. While  unsweetened dried fruit is generally preferable in conserves, it’s very difficult to find unsweetened dried cranberries, so feel free to use the sweetened version if that’s what you have available.

Before You Begin:

Prepare calcium water.  To do this, combine 1/2 teaspoon calcium powder (in the small packet in your box of Pomona’s pectin) with 1/2 cup water in a small, clear jar with a lid. Shake well.  Extra calcium water may be stored in the refrigerator for future use.

Yield: 4 to 5 half-pint (8-ounce, or 236 ml) jars

Ingredients

2 pounds (910 g) ripe, firm pears

1/2 cup (75 g) dried cranberries

2 tablespoons (28 g) finely chopped crystallized ginger

1/2 cup (63 g) sliced almonds

1 1/2 cups (355 ml) water

1/2 cup (120 ml) lemon juice

4 teaspoons (20 ml) calcium water

1 cup (200 g) sugar

3 teaspoons (9 g) Pomona’s pectin powder

Directions

  1. Wash your jars, lids, and bands. Place jars in canner, fill canner 2/3 full with water, bring canner to a rolling boil, and boil jars for 10 minutes to sterilize them. (Add 1 extra minute of sterilizing time for every 1000 feet above sea level.) Reduce heat and allow jars to remain in hot canner water until ready to use. Place lids in water in a small sauce pan, heat to a low simmer, and hold until ready to use.
  2. Peel, core, and dice pears.
  3. Combine diced pears in a saucepan with dried cranberries, crystallized ginger, sliced almonds, and the 11/2 cups (355 ml) water. Bring to a boil over high heat, reduce heat, and simmer, covered, for 5 to 10 minutes or until fruit is soft, stirring occasionally. Remove from heat. Mix well.
  4. Measure 4 cups (946 ml) of the cooked mixture (saving any extra for another use), and return the measured quantity to the saucepan. Add lemon juice and calcium water, and mix well.
  5. In a separate bowl, combine sugar and pectin powder. Mix thoroughly and set aside.
  6. Bring pear mixture back to a full boil over high heat. Slowly add the pectin-sugar mixture, stirring constantly. Continue to stir vigorously for 1 to 2 minutes to dissolve pectin while the conserve comes back up to a boil. Once the conserve returns to a full boil, remove it from the heat.
  7. Can Your Conserve: Remove jars from canner and ladle jam into hot jars, leaving 1/4 inch of headspace. Remove trapped air bubbles, wipe rims with a damp cloth, put on lids and screw bands, and tighten to fingertip tight. Lower filled jars into canner, ensuring jars are not touching each other and are covered with at least 1 to 2 inches of water. Place lid on canner, return to a rolling boil, and process for 10 minutes. (Add 1 extra minute of processing time for every 1000 feet above sea level). Turn off heat and allow canner to sit untouched for 5 minutes, then remove jars and allow to cool undisturbed for 12 to 24 hours. Confirm that jars have sealed, then store properly.


From: http://www.cappersfarmer.com/food-and-entertaining/pear-cranberry-conserve-recipe.aspx?PageId=1


2015 in review

It’s way too obvious that my blogging didn’t turn out the way it was intended at the beginning of this journey. Health problems between my husband and myself (2 surgeries within 4 months last summer) took up a lot of effort and time to heal.  Blogging took a back seat to these issues and other life’s events.

BUT! It’s almost 2016!!! It’s time for New Year’s resolutions. We all make resolutions, most of them good for the first week, then it’s off to the recesses in the back of the cranial gray matter. Do you do that too? Resolution. The word sounds good. The intent behind it is good. Best of all, is the resolution kept!

My 2016 Resolutions are:

  1. Return to this blog with a fervor never seen before! Life is wonderful, the knowledge being gained on this end is incredible. Knowledge not shared is knowledge not gained. What good is it to hold it, and not make the time to share it with others.
  2.  Make more time for my husband and I. We are not spring chickens anymore. He is 66 and I am (sigh) 61. We’ve spent the last 5 years building this farm to a self-sufficient status. It’s been hard work, tiring, exasperating, and sometimes with tears. Now it’s time for us. Candlelight dinners, fishing on the lake, camping, hunting, whatever he likes, we are off to do.
  3. Get my wood shop together and functional. I love working with wood, all the way from the raw state, to refinishing old furniture. I love making things from pallets and want to try cabinet making. I’d also love to try turning wood on a lathe. My friend just started doing this and turns out some beautiful pieces. He’s passed the zeal to me also.
  4. Health…always on the list. Last year (2015) wasn’t good, health-wise. Two surgeries, new diagnosis of fibromyalgia for me, and an impending knee replacement for my husband (for 2016). These things slow one down. It’s time to get back on track, eat right, exercise and work on lowering the prescription medication list.
  5. Finish my certification as a Family Herbal Practitioner. I have two more classes to complete and then pay the fees for a national certification. It’s within reach now. Time to get ‘er done!
  6. Community.  We have a free health clinic in town for the indigent people around here. As a retired RN, there’s no reason why I can’t volunteer at least a couple days a week to help out there. And too, with the certification as a Family Herbal Practitioner on the near horizon, who knows? That might come in useful there as well.
  7. Learn to knit and crochet!!! I know. That’s been on the list for many years and goes to the deep gray cranial matter recesses. I bought two skeins of yarn, a huge, size K crochet hook, have a simple, single crochet stitch pattern to make a scarf, and it’s out on the end table in the living room. Since it bugs me so much to have it there, I am starting on it as soon as this blog post is done!
  8. Put together a tribal association for the Cherokee descendants (Cherokee Heritage tribe)  in our area. Most tribes, those that are government sanctioned such as the Eastern Band of Cherokee, The United Keetowah Band of Cherokee, and the Cherokee Nation in Oklahoma have a strict policy for admission to their nation. It requires either a blood quantum level or documented relationship from the Dawe’s Roll or other rolls taken during the Removal Act. Most people do not have a documented history of their heritage. They know by word of mouth or of association with other family members who have Cherokee lineage. I’ll write a post later about our intended tribe that’s in the making.

In the meantime, life is good. It’s busy as always. The farm is growing and is at a stage where we can sit back and enjoy it.

What are your New Year’s Resolutions? Please, share here. We may have a small community of readers who can read your posts, and encourage you as the year goes on. Let’s make a support group right here, help each other along the way, make new friendships and renew the old friendships. It’s a New Year (almost) and it’s time to live and thrive!

Happy New Year to you, and may all the blessings from our Creator be bestowed upon you and your family and friends. May health be good, may cheerfulness and happiness be yours, and may you prosper greatly this year! ~~~

Candy

————————————————————–

The WordPress.com stats helper monkeys prepared a 2015 annual report for this blog.

Here’s an excerpt:

A San Francisco cable car holds 60 people. This blog was viewed about 2,200 times in 2015. If it were a cable car, it would take about 37 trips to carry that many people.

Click here to see the complete report.

We’re Ready…

Speed Star 1.0435379  00

Are you ready? Ready for what? Winter snow and ice to disappear for another year? Ready to have warmer temperatures so you can enjoy the outdoors? Ready to prepare the garden bed? Ready for spring?

We are here at the Rick’s Ranch/Midwest Homestead garden is waiting for my hands in it’s dirt. The pigs are busy eating weed roots, clearing the garden plots and providing it with natural, organic fertilizer. We’ve had so many seed catalogs come in this year that it’s actually given me a headache trying to keep up with what we wanted to order, needed to order for our seed sales business and for our homestead. We have wish lists, need lists,        ” have to have it or the homestead won’t survive lists”. Never mind that the snow is still 8 inches deep in some places. The sun is shining, it’s well above freezing, and the adrenalin is pumping in anticipation of this year’s gardens.

It’s time to pull the portable greenhouses in, clean them, and ready the seed start trays for planting. Wash, disinfect, air dry. It’s an annual event that most times takes place in our bathroom, under the spray of the shower head. Hopefully this spring the greenhouse will be completed and these chores can be taken outdoors, where they rightfully belong. And, it’s time to take note of which seeds we have, and teaching others, how to best pre-treat seeds for optimal germination and growth.

Seed Starting

Unlike the seeds of annuals, lots of perennial seeds require a period of moist cold (cold stratification) before they will germinate. In the wild, this occurs naturally by the wind scattering the seed, animals carrying the seeds on their feathers or coats then the seed is covered with grass, weeds and leaves and finally cold temperatures and/or snow. Without this natural process, many seeds simply will not germinate. It is called Mother Earth’s Cycle of Life. It’s continued from the very beginning, and shall continue until the end of days if allowed.

Human intervention has evolved to include artificial means of stratification. We have learned that soaking certain plant seeds in clear water, maybe using the addition of a natural, organic additive, sometimes helps germination to occur. We have learned to mimic Mother Nature’s way of cold stratification by sowing seeds in a planting medium, storing in a cold environment before planting. We have learned that some seeds need to have their shells scarified, or nicked or sanded down to the inner portion of the shell to allow the waiting embryo to emerge in it’s time. We have learned to mimic that which was natural, in order to hasten a plant’s growth. Should we? Absolutely! Some plant species are quickly becoming extinct due to mankind’s over zealous harvesting, land clearing or natural disasters. In order to save and propagate these species of plants, we should and do, intervene.

Some of the ways to hasten seeds to germinate are discussed below.

Cold Water Soaking:
You can use fresh tap water, preferably that which contains no chemicals. Rainwater is another good source of liquid for soaking. Adding liquid kelp (diluted per manufacturer’s instructions) to the water will hasten germination once the seed is planted.

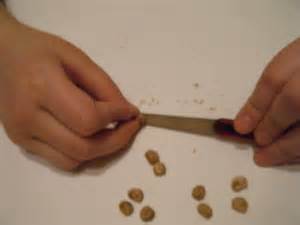
Generally, seeds that appear wrinkly are seeds that need soaked for at least 24 hours before planting.

Seeds that need soaked before planting include:

Belladonna Henbane Black or White Mandrake
Monkshoods Okra Nasturtiums

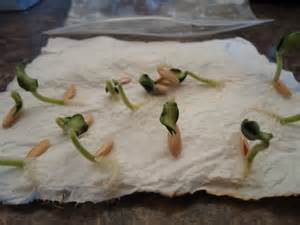
Warm Stratification then Refrigeration:
You need something to hold the moisture in, such as a bit of sphagnum moss or peat moss for acid loving plants, clean sand, vermiculite that has been slightly moistened, paper towels for others. Slightly dampen the medium, place seeds in the medium and store in the refrigerator, in a zip lock bag, preferably for 3 months. If one doesn’t have that 3 month window, store at least 3 weeks. Liquid kelp diluted per the bottle’s instructions, will hasten germination for your seeds. Many seeds do better if placed in the dampened medium, kept in a warm place 59-68°F for 2 weeks then placed in the refrigerator. Check the bag’s contents weekly to look for signs of decay such as a musty smell, mold, or oozing seed matter. Most times that is as a result of improper packaging at the manufacturer’s, the seed is too old, seed may not have been stored properly during shipment or in the home, or contaminated seed. Remember that some seeds may not actually germinate until the second spring.

Even if the seeds germinate during this time period in the refrigerator, it is perfectly acceptable to plant, just as you would any other seed.

seed germination

Those seed would include:

Anise Hyssop Monkshood Masterwort
Belladonna Betony Motherwort
Mandrake (Black and White) Black cornflower Moonwort
Black Henbane Black nightshade Mugwort
Calamus Root Myrtle Pokeweed
Climbing Nightshade Cowslip Vervain
English Bluebells Red Pasque Flower Rose Milkweed
Green Wizard Coneflower Gray Sage Rowan
Harebell Russian belladonna Helebores
Heather Tansy Poppies
Valerian Hops Valerian
Jack in the Pulpit Old English lavendar Wolfsbane
Lily of the Valley Purple Coneflower Turtlehead
Meadowsweet Clematis Butterfly Bush
False Indigo Lady’s Mantle Bluebeard
Fuschias Foxtail Lily Peruvian Lily
German Status Ibiscus Sweet Peas
Catmint Evening Primrose Phlox (all)
Chinese Lantern Sweet Cicely Candytuft
Gloxinias Waxbells Bloodroot
prairie Mallow Speedwell Sedum
Stoke’s Aster Balloon Flower Viola
Globeflower Toad-lily Foamflower
Ironweed Black Eyed Susan Burnett
Soapwort Wild Rose Fruit tree seeds

Here is a link for all the seeds known to need stratification. It is listed by the genus and species names: It is written by seed expert Tom Clothier and is well worth the time to read. It contains multiple links for germination temperatures, stratification and scarification, garden pests, pollinators and such.

http://www.tomclothier.hort.net/page02.html (and) http://tomclothier.hort.net/index.html

A seed expert who’s works I enjoy reading, is Norm Deno. J Hudson seeds has multiple links to his seed starting methods written clearly and concisely. It contains vast information regarding all different types of plants including perennials, annuals trees, and vegetables.

http://www.jlhudsonseeds.net/Germination.htm

==========================================================

Scarification:
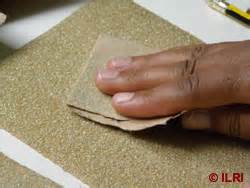
Certain seeds with thick shells need to be scarified if they are going to be able to germinate. To do this, use a piece of sandpaper or a nail file to gently rub off part of the external shell. The best way to know how deep to rub is to rub until you can see a different color of shell appear. Do not rub all the way through the shell. It only needs to be rubbed down enough that water can get through the shell into the seed, and to allow the young, germinating embryo to emerge. Some seeds need both scarification and stratification.

How to scarify seeds.
seed scar with file

seed scar with sandpaper
Some examples of seed that need scarification are:

Morning Glory canna seeds purple hyacinth bean vine
Nut Tree Seeds Fruit tree seeds

Spring and direct planting:
Many seeds do not require special treatment such as soaking, scarification or stratification. They can be planted without inoculants, directly in the soil. For a complete list of these seeds, see the following link from Prairie Moon Nursery.

http://www.prairiemoon.com/Species-Requiring-No-Pre-Treatment-Code-A.html

==============================================

Fall Planting:
Fall planting may be an answer to having fresh produce all winter. Many old timers use this method, planting in cold frames, greenhouses, or on sunny, enclosed porches in containers. I’ve also seen used, cleaned old tractor tires

old tire planter   tire planter
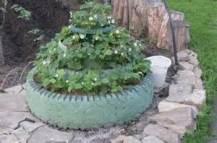
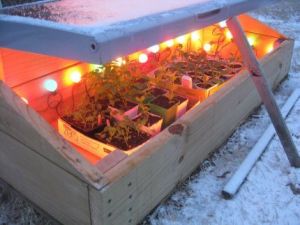
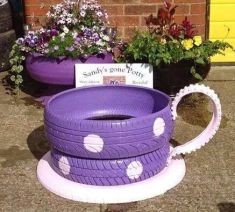
and livestock mineral lick buckets, containers covered with glass during the day…when the temperature is 35-45 degrees , and the glass covered with a piece of cardboard to maintain internal heat at nightfall. One newer gardener used clear Christmas tree lights inside his cold frame to provide warmth on the coldest days. This isn’t his light heated cold frame, but this picture conveys the general idea.

light heated cold frame

Some species of vegetables and flowers do well with fall (and early spring) planting. Brassicas (cabbage, cauliflower, broccoli, brussel sprouts, bok choy, kale, radishes), Mustard Greens,  spinach,  and parsnips have a sweeter taste when grown in cooler weather.

crucifers

Happy Winter! Now is the time to stratify and/or scarify those seeds!!

Speed Star 1.0455354  00

References:
http://www.agardenforthehouse.com/2013/02/perennials-which-require-cold-stratification/

http://www.agardenforthehouse.com/2013/02/perennials-which-require-cold-stratification/

http://www.agardenforthehouse.com/2013/02/perennials-which-require-cold-stratification/

http://www.agardenforthehouse.com/2013/02/perennials-which-require-cold-stratification/

http://tomclothier.hort.net/page02.html

http://www.prairiemoon.com/How-to-Germinate-Native-Seeds.html
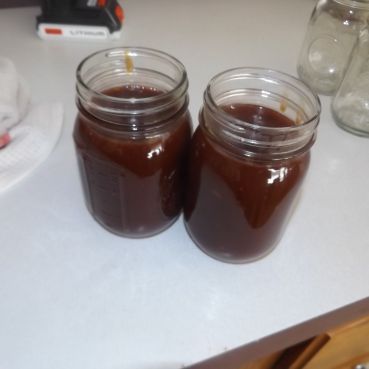
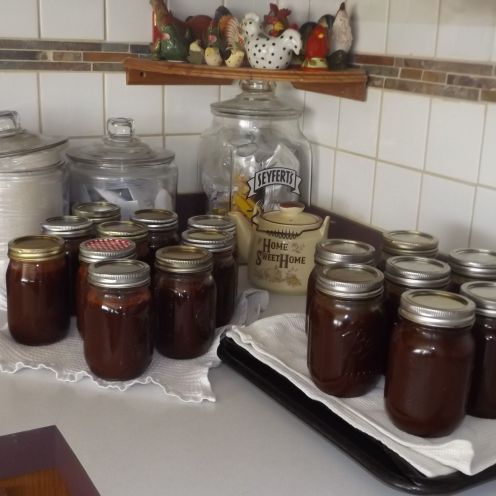
Educational Opportunity to Share

thIt’s the coldest day of the year, so I’ve literally spent hours online reading about gardening, building a new yahoo group entitled The Garden Spot and watching it grow exponentially in the last 24 hours. As I gazed through email from wonderful places like Johnny’s Seed, Winding River’s Herbs (someday, when we get back to UT to visit old workmates and browsing the countless Deseret Industry stores, I absolutely positively have to visit her) and many others, the following educational opportunity came across Johnny’s Seed site. I wanted to share it with you hoping you might benefit from it also.

Johnny's Selected Seeds

Interested in Starting a Hydroponics Business?

Interested in Starting a Hydroponics Business

Consider attending an upcoming 2-day short course on “Starting a Successful Hydroponics Business,” being offered twice next month.

The short course is designed for those considering the venture or who have recently started a hydroponic business. Attendees will enjoy hands-on learning at one of the premier facilities in the Southeast for teaching hydroponic growing in a working greenhouse setting: the UF/IFAS Suwannee Valley Agricultural Extension Center near Live Oak, Florida. An optional tour provides an exclusive visit inside one of the most successful, modern greenhouse hydroponic operations in Florida.

Sponsor: University of Florida/Institute of Food & Agricultural Sciences
Course Title: Starting a Successful Hydroponic Business
Dates: March 16-17 or March 20-21, 2015
Location: Suwannee Valley Agricultural Extension Center, Live Oak, FL
Johnny's Selected Seeds

Enroll by March 6th to receive the Early Bird tuition discount. For more information, call Dilcia Toro or Karen Hancock at (386) 362-1725.

Register Today »

Collecting Fall Herbs: Field Day Friday

Do you look at the beauty of weeds like I do? Fields of the yellow tasseled goldenrod, roadsides covered in frilly blues of  chicory, happy looking Black eyed Susan’s and the purples of the many different types of thistle invigorate the sense of beauty as far as the eye can see. I see beauty all around me, but I also see the innate medicinal value of these plants as well. We have many of them growing on our farm. Some would tell me to cut them down, to pull them out, but I won’t. Instead, as nature does her work, I allow them to spread naturally. My husband has known me to bring home seeds and roots of some plants to transplant in our herb garden as well.

Being part Cherokee and having learned much from my elders, I know that all year long we are blessed with opportunity to gather wild herbs to save and use for different purposes. I can’t prescribe what herbs another should use, but I can share with you what different ones are used for, and allow you to make decisions for yourself. Also, having practiced as a Registered Nurse for 26 years, I will be the first to tell you to talk with your personal physician before using any herbal, holistic type of healthcare regimen. He or she and you, should decide what is best for your personal condition and go from there.

Today, I want to share with you one of the fall herbs that I’ve gathered, it’s medicinal values and how to collect and dry. Herbs, in general, should be collected in the mornings, after the dew has dried, but before the heat of the midday sun. Most herbs may be dried on a screen, covered with another screen or cheesecloth to keep off insects. Some herbs may be hung upside down, in small bunches, and allowed to air dry. Some people advocate drying herbs in a dehydrator or in the low heat of an oven. It’s a personal choice, but at our homestead, we don’t use either of those methods. My pantry looks like an upside down garden at the moment, and smells heavenly.

Today, let’s talk about goldenrod. goldenrod  These flowers amaze me. For so long, they’re been regarded as one of the worst allergens of the fall. They can cause issues for some, but do you know how medicinally good they are? Used for hundreds of yeas by Native Americans, they have antifungal properties, the saponins, that can help alleviate such yeast infections as oral thrush when a tea made from it is used as a gargle. It can be used for skin yeast infections or those elsewhere when used as a wash or rinse over it. Gargled, as a tea, it helps to stop coughs and sore throats. As a weak tea, it can help stop diarrhea naturally, without having to resort to chemical compounds found in over-the-counter medications. It’s been found to be an effective treatment in colitis and IBS.

Goldenrod tea is also beneficial for the urinary tract, kidneys and bladder. The saponins, tannins,  and flavonoids found in the flowers and leaves help keep infection and stones from forming in the urinary system.

Mixed with dandelion and thyme in a tea, it is an effective immune stimulating drink.

The usual dosage for a tea for ingestion or gargle is about 1 teaspoonful of the dried herb in a cupful of boiling water. Allow the herb to steep for about 10-15 minutes for the full effect, strain, sweeten with honey if desired, and drink. For gastrointestinal issues, it’s recommended to drink about 4 cups (1 quart) of tea daily.

We keep goldenrod planted on our farm, not just for medicine, but to draw in pollinators. goldenrod with bee

I love watching bees and butterflies visit the golden fronds goldenrod with butterfly. and coating their legs and bodies with the powdery pollen.

Goldenrod is associated with fall, the waning of the heat of the summer and watching the trees slip into the last final burst of glory. It’s fall already?  I am not ready to give summer up quite yet.

Fall Readiness

It’s time to start planning. Don’t we all, and most of the time? Each morning as I open my eyes, stretch, smell the crisp cool air, I begin to contemplate not only the day’s needed activities, but start planning for fall and winter. It seems like summer is barely gone. Fall is beautiful, the colors, the cool respite after a long, hot summer. But, soon to follow are the harsh cold winter months. Living on a farm is glorious, but it sets off a whirlwind of activities that absolutely must be done before winter coldness puts a stop to it.

We’re busy gleaning the last of the garden. Ripe tomatoes are picked daily and frozen until a large enough batch is ready to can. Squash and pumpkins are beginning to turn their lovely shades of yellow to orange, the corn is being harvested and the garden, slowly, but surely is being cleaned out to receive her yearly dose of compost and manure. This year we will plant cover crops on top of the garden for green manure also. I have turnip seed and buckwheat to sow. Our rabbits, chickens, ducks, geese and goats will appreciate that feast as it grows. And, our garden will benefit from the nitrogen content of the plants as we till it under next spring.

But, planning ahead, we have a list of other things that need to be done. I suspect that this list could and would apply to those who live in urban areas too.

Water. water barrel on palletThis is at the top of the list. Water storage for the “what if’s” that happened more time last year than we’ve seen since the ice storm of 2007. What if you are suddenly without power and are unable to draw water from your well? Do you have an alternate means such as a hand pump that will work for your depth of well? Hand pumps on deep wells are available, but try to pump water from a 180 foot well. By the end of the power outage, you will have excellent deltoid and trapezius build. Do you have a generator? A wind mill? A well bucket? If you live in the city and depend on municipal services, many times they don’t fail, but how many times have you experienced “boil water” orders? In the event of a natural disaster, how reliable will your municipal water supplier be?

 How much water do you need? That depends. Most sites recommend at least 1 gallon per person per day for drinking and minimum sanitation. Quite honestly, for our personal needs, this isn’t enough. What we do, and this is a personal preference, is to store at the bare minimum, 2 gallons per day. We also keep our swimming pool filled summer and winter. Our pool has about 7000 gallons of water, which will go a long way in a power outage.  Swimming pool water is not potable for humans, but it is an excellent water source for the farm animals since we don’t have a pond…yet. The pool water can also serve for bathing and commode flushing if needed.

Storing water. How? In almost anything. Glass and food grade plastic are the most common choices. Long term, bulk water storage requires a little extra. It’s at this time of year that we empty, sanitize, refill and add 8 teaspoons of bleach to a 50 gallon, food grade barrel, cap and store on pallets.

Food.nutty squirrel Again, the amount to lay back depends on the number of people in your family, finances and room to store food. There are several food storage calculators online. The one we find most useful is  http://lds.about.com/library/bl/faq/blcalculator.htm .  One must take into consideration special needs of diabetics and those on other diet restrictions, infants, the elderly, and your own personal likes and dislikes. A key factor to food storage is to keep it fairly simple, easy to prepare, allow variety, wholesomeness and nutritive values. I’d not recommend storing a year’s supply of pizza, even though it truly is a healthy food, when you look at it’s contents. Many people think that food storage is a bulky task, hard to find places to store. It truly isn’t. Space under beds, couches, even behind and underneath dressers or entertainment centers is a possibility. I’ve seen closets converted to pantries, and even bases of kitchen cabinets made with hinges on the baseboard and canned goods stored under those. Those with basements are indeed blessed. Rafters can serve as excellent canned good areas if needed. Shelving units can be purchased or hand made. I’d advise never to store anything directly on concrete floors though as concrete can react with plastic containers as well as metal containers, corrode and/or disintegrate those in time.                                                                                                                                food storage between wall studs  food storage under couch water food storage pantry 4.5 inches wide in a mobile home hallway. built from 1x4s and 1x2s


Don’t forget to remember your animals in your food storage plans. Buy, can, or freeze enough food for them to get them through precarious times. Our outside animals necessitate a little extra. We store food for them, in the barn, in large 55 gallon barrels with lids. Goats are notoriously nosey, and piggy, and, well, determined. We have to use the large metal, lidded barrels in their barn just to keep the food stuff intact and also free of rodents. It also means that we need to check drinking water heaters to make sure they’re operable, make sure that we have enough extension cord in good repair to service the heaters. It means that we need to lay back enough hay, and soon, to last through the winter. As another blogger wrote, shortages are common in the winter. Many farmers keep what they have for their own livestock first. It’s better to stock up while you can, as it becomes available, rather than waiting until the last minute or in the middle of a crisis.

Housing.chimneyman It’s time to check for any outside needed repairs. Is the power line coming into the house secure? During the winter ice storm of 2007, we saw many conduits leading from the power lines to inside the house, bent and ripped away from the house. Check those, secure with clamps as needed and be safe. Windows, shutters, faucets, outbuildings need inspected and repairs made as necessary. This includes storage sheds, barns, garages, and your home. There’s nothing worse than having to go out in the middle of a freeze to make a repair that’s become mandatory when it could have been fixed simply and with much more ease during the warmth of summer or fall. It’s also time to pull out snow shovels, blowers, ice melt, and auto windshield de-icer.    

     fixing a water faucet

Heatwood fireplace How do you heat your home? Take into consideration the rising cost of propane in the winter months, the potential for a shortage of dried wood for wood heated homes, and the potential for electrical outages in total electric homes. Do you have a safe backup source of heat? Safety is a key word here. I’ve heard people tell me that they have a kerosene heater to use. That’s fine, but make sure you have a way to ventilate that kerosene heater well. Make sure you have a way to ventilate your gasoline powered generator that you will use for space heaters, very well. Carbon monoxide poisoning is, or can be deadly. It sneaks up on the unsuspecting individual and overcomes them before they know it. My husband could tell you a hair raising story about such an event with him just this summer. Ventilate, ventilate, ventilate. Wood. If this is a primary or back-up source of heat for you, you are most likely aware of how many cords of wood is needed for a winter. Stock up now, place it up on pallets and keep it covered and dry. Do this while the weather and supply allow you an ample stock. Wood pellet stoves, again, you know how many bags of pellets your stove needs. The math is easy. Lay back at least enough to get you through an anticipated crisis. For those who use a fireplace, now is the last chance you will have before winter sets in, to clean the flu, make necessary repairs and ready your hearth for use.

Clothing and blankets. gmbbigI can remember my grandmother using this time of year to finish quilts. She had quilts made from all sorts of fabric, from Grandpa’s coveralls, to pieces of flannel and wool. I still have one of her wool quilts that is lined with several layers of flannel, has a flannel back, and is so heavy that it held me fast in bed when I was only 5 years old. She mended boots with patches, mended coats, stockings and gloves. Winter wear and heavy curtains were brought out and aired in the crisp coolness of the fall afternoons. Living in an old farmhouse meant drafty and chilly rooms. Now, 50 years later, I have learned that it wasn’t just her house that was drafty at times. Most of us experience the same…ummm…memories. We’ve discovered the art of using window quilts in some of the back rooms during the winter. I’ve made smaller quilts to fit those windows that have a tie back to use during the daytime. At night, the window coverings are closed and keep the day’s warmth in for quite a while. The same inspection and repairs, if needed, is a memorable task we make to this day, just as my grandmother did so many years ago. Items such as boots, gloves, hats, scarves, are purchased well in advance of the winter’s need. Again, no one knows what the winter will bring and it’s better to be prepared rather than in need and the supply not available.

The last item I want to share with you is light. It’s not a necessity, but a welcome luxury in the event of a crisis situation. What are your backup sources for lighting? Battery operated? Candles? Oil lamps? Make sure you have enough fuel stored, and safely for oil lamps. Make sure you have enough matches or lighters stored away to light them, or the emergency candles you have stored. And, with candles, make sure you have a way to use them safely, sans the possibility of them tipping over or having a breeze blow flammable items into the flames. Batteries need to be purchased and stored in a cool, dark place for longer viability. One favorite that I’ve seen used recently are solar powered outside lights. They’re safe, inexpensive (most likely going on sale shortly) and give a fair amount of luminescence for a small sum of money. Here are just a few ideas.

mason jar lamp  oil lamp II        Solar Accent Lights.  batt lights

I’m sure that most of you could come up with a much longer list than this for your fall chores either around your city or rural homestead. The most important thing to do, is to get them done. Procrastination isn’t an option if you want to be prepared. If you need to procrastinate, do so when the ground is covered with a heavy blanket of fresh fallen snow, cover up with your nice, warm quilt, have a pair of thick wooly socks on and curl up in front of the fireplace that has been cleaned, repaired and is stock full of the wood you’ve gathered for just this very pleasure.

                                                                  family feet


It’s A Good Day to Bake Bread

Oh my! Living in the Midwest at this time of year is a one of a kind experience. One day, it’s hot, muggy, the humidity level is so high one can barely breathe, the next day is cool, crisp and fall-like, just inviting you to be outside savoring the fresh air and sunshine. Today, we’re blessed with rain. The storms moved in yesterday afternoon and drenched our parched earth, the crunchy grass with a blessed drink of liquid that it all so desperately needed. It’s still cloudy and cool outside, so being the farm wife that I am, it’s a good day to bake bread and finish canning the tomatoes and peaches.

I want to share with you a recipe that I’ve used for quite awhile.The original recipe came from http:www.restlesschpotle.com and I’ve used it for the last couple of years. About the only change I made from her recipe is that we leave the ginger out and added or tweaked a couple of the other ingredients to suit our personal taste. It’s wonderful, light, and has a delicious taste of honey and buttermilk. I’d advise using raw honey if you have it available. The stronger the honey flavor, the better the taste of the bread.

Honey Buttermilk Bread

Ingredients

  • 2 1/4 teaspoons of yeast granules  (1 packet)
  • 1-2 teaspoons sugar
  • 1/4 cup warm water
  • 2 cups buttermilk heated gently to lukewarm
  • 1/3 to 1/2 cup natural raw honey
  • 1/4 cup melted butter or margerine
  • 1 teaspoon salt
  • 1/2 teaspoon baking soda
  • approximately 6 cups white bread flour. Plain (not self rising) flour may be used, but the end product is not as tasty and light, nor does it have quite the same texture.

Instructions

  1. Dissolve yeast in warm water, then add sugar. Set aside until you see bubbles forming.
  2. After the first mixture bubbles, add buttermilk, honey, salt, and baking soda.
  3. To the liquid, add about three cups of flour and mix until smooth and elastic feeling. This can be done by hand or with the dough hook on an electric mixer.
  4. Add butter to this mixture, making sure that it is completely incorporated into the batter.
  5. If you are using an electric mixer, when dough pulls from the sides of the bowl remove the dough a floured surface and add enough flour to make a pliable mound of dough. Knead this dough until it is elastic and smooth.
  6. After kneading, place it into a greased bowl and allow it to rise until it is at least doubled in size. (About 60-90 minutes)
  7. Punch down, cut in half, and roll each half into a rectangle, about 1 inch thick. Then by hand, roll each rectangle, starting from the short end into a “log roll”. Pinch seal the long side. With your hands, gently mash the short sides down, tuck under the loaf and place in greased loaf pans. Allow loaves to rise until doubled in size, about 45 minutes.
  8. Preheat oven to 400F. Bake for 30 minutes or until golden brown on top and hollow sounding when tapped with the fingertips.
  9. Remove loaves from oven
  10. Allow to cool in pans for 5-10 minutes. Brush tops of loaves with melted butter or margarine.
  11. Turn out onto wire racks and allow to cool completely before cutting or tearing bread.
  12. Enjoy!!

A Canning We Will Go…

Hi ho, to the garden we go…a canning we will go! If I only knew how to add musical notes to the post… Oh yes, and thankfully and giving thanks to the Lord, our garden has been a magical menagerie of clover, weeds, tomatoes, peppers, pumpkins, green beans, squashes of all sorts, cucumbers, potatoes…and a host of other wonderful vegetables this year. Now that the garden is producing full swing, we’ve pulled out both canners, the boiling water bath cookers, jars, you name it. My counter tops are a delightful mess of jars and completed canning projects.

  Speed Star 1.0372487  00

I just finished canning 14 quarts of pickle relish, these, and there are more than likely double this amount of tomatoes waiting in the refrigerator to be made into salsa and tomato sauce.

There’s nothing better than growing and preserving your own food. There’s no greater sense of accomplishment and pride than seeing a pantry full of your home canned food. I follow the USDA site and receive notices of recalls and notices from multiple food processing companies to pass along to 2 yahoo groups I own. We are so thankful that we’ve chosen our self sufficient lifestyle, raising our own meat, growing and canning our own vegetables and fruit. We support our local farmers, our friends who have roadside stands, local farmer’s markets. We know that their standards of farming equal ours and, quite honestly, when we purchase fresh, we purchase from them. I know that our garden is raised organically, no chemicals, no GMO products, nothing but a lot of hard work, fresh compost from our own farm, and big, juicy produce in return.

I won’t say that canning is easy. In fact, at times, it’s far from it as you pick fresh food from your garden, prepare and package it for the canner. Sometimes it’s tedious, sometimes one’s back and fingers ache from the preparation process. But, I can think of at least a half dozen or more positive notes to canning one’s own bounty. Think of the benefits.

Benefits you say? Absolutely!! We advocate “grow your own” and “DIY”. Why?

1. You know what is in that home canned food. You process food safely. Do mass merchandisers do this? Most likely not, considering the number of recalls that are posted weekly.

2. You know how it’s been handled and processed. No one’s hands have touched the contents of the food other than yours.

3. Lower your food bills. Have you noticed the rising cost of fresh food and meat in the grocery stores? It’s outrageously high and will only increase in price as time goes on. We’ve not purchased meat in almost a year. I was shocked at the sticker price of simple, cheap 70/30 ground beef at being close to $4.00/lb. When did that happen? 98 cents for a can of asparagus? I think not!!

4. It provides a cushion against store outages, short paychecks or no paychecks, Create your own stockpile for “in case of” and sleep better knowing that your family will be fed if times are rough.

5. You can be assured of the food quality and taste. Canned properly, home canned is much healthier, maintains it’s fresh taste and nutritional value.

6. For many, canning and preserving one’s own food is a necessity. In remote areas, access to grocery stores is not always an easy task and at times, not do-able at all.

7. A sense of pride. You grew it, you processed it, you eat it! 

8. Gifting and sharing. Nothing says love more, than sharing a jar of homemade jam and a loaf of fresh baked bread from your oven.

9. It provides you with a link to the past. Our grandmothers and mothers most likely preserved their excess. I can remember playing store in my grandmother’s root cellar, picking and choosing mentally, which food I was going to buy for that day. Granted, I didn’t know what everything was, but the colors were certainly pretty lined up on her shelves. My mother didn’t can, other than to make our winter batch or three of jams or jellies, but she stored food in the freezer. I have reverted to my grandmother’s lifestyle on her farm, and every time I open the pressure canner and remove those hot, boiling mason jars, I wonder if she’s smiling down from heaven at me. Somehow, I think she is.

   Grandma and Grandpa New, me and dad 1957 this is my dad and I, Grandma and Grandpa